Installing a SlapOS Node
This tutorial will guide you through the process of installing a SlapOS node on a computer. A regular node (referred to as COMP-1,2,3) is used by the SlapOS Master to install software on the node and then provide instances of this software within computer partitions. For details please refer to the SlapOS introduction.
Note, that there is one node referred to as COMP-0 throughout the documentation, which provides services to SlapOS Master (COMP-ROOT) besides regular nodes like the one we are going to install here (called COMP-1,2,3...).
Agenda
- Prerequisites
- SlapOS Node Installation
- Validation
Verify Re6st is Running
sudo su
$ service re6stnet status
You can use the above command to see whether Re6st is working. The output should be similar to:
● re6stnet.service - (null)
   Loaded: loaded (/etc/init.d/re6stnet)
   Active: active (running) since Fri 2018-03-09 16:43:23 UTC; 6min ago
   Process: 26395 ExecStop=/etc/init.d/re6stnet stop (code=exited, status=0/SUCC
  ESS)
   Process: 26423 ExecStart=/etc/init.d/re6stnet start (code=exited, status=0/SU
  CCESS)
   CGroup: /system.slice/re6stnet.service
           ├─26431 /opt/re6st/parts/python2.7/bin/python2.7 /usr/sbin/re6stnet@r
  e6stnet.conf
           ├─26437 openvpn --dev-type tap --dev re6stnet-tcp --persist-tun --per
  sist-key --script-security 2 --up /opt/re6st/eggs/re6stnet-0.485-py2.7.egg/re6
  st/ovpn-client --tls-server --mode server --clien...
           ├─26444 babeld -h 15 -H 15 -L /var/log/re6stnet/babeld.log -S /var/li
  b/re6stnet/babeld.state -I /var/run/re6stnet/babeld.pid -s -C ipv6-subtrees tr
  ue -C default max-rtt-penalty 5000 rtt-max 500 rt...
           ├─26537 openvpn --dev-type tap --dev re6stnet1 --persist-tun --persis
  t-key --script-security 2 --up /opt/re6st/eggs/re6stnet-0.485-py2.7.egg/re6st/
  ovpn-client --nobind --client --remote 163.172.45...
           └─26862 openvpn --dev-type tap --dev re6stnet2 --persist-tun --persis
  t-key --script-security 2 --up /opt/re6st/eggs/re6stnet-0.485-py2.7.egg/re6st/
  ovpn-client --nobind --client --remote 52.36.124....

  Mar 09 16:43:23 slapostest2 systemd[1]: Started (null).
After this step Re6st is installed and the machine is accessible over IPv6.
SlapOS Node Installation
The following steps will guide you through the installation of a SlapOS node on a server. This includes handling both IPv6 connectivity to be able to access computer partitions and the eventually instantiated software as well as installing the SlapOS node (including partitions) along with the SlapOS client.
Get Slapos Token
🔗 Rapid.Space Panel Servers List
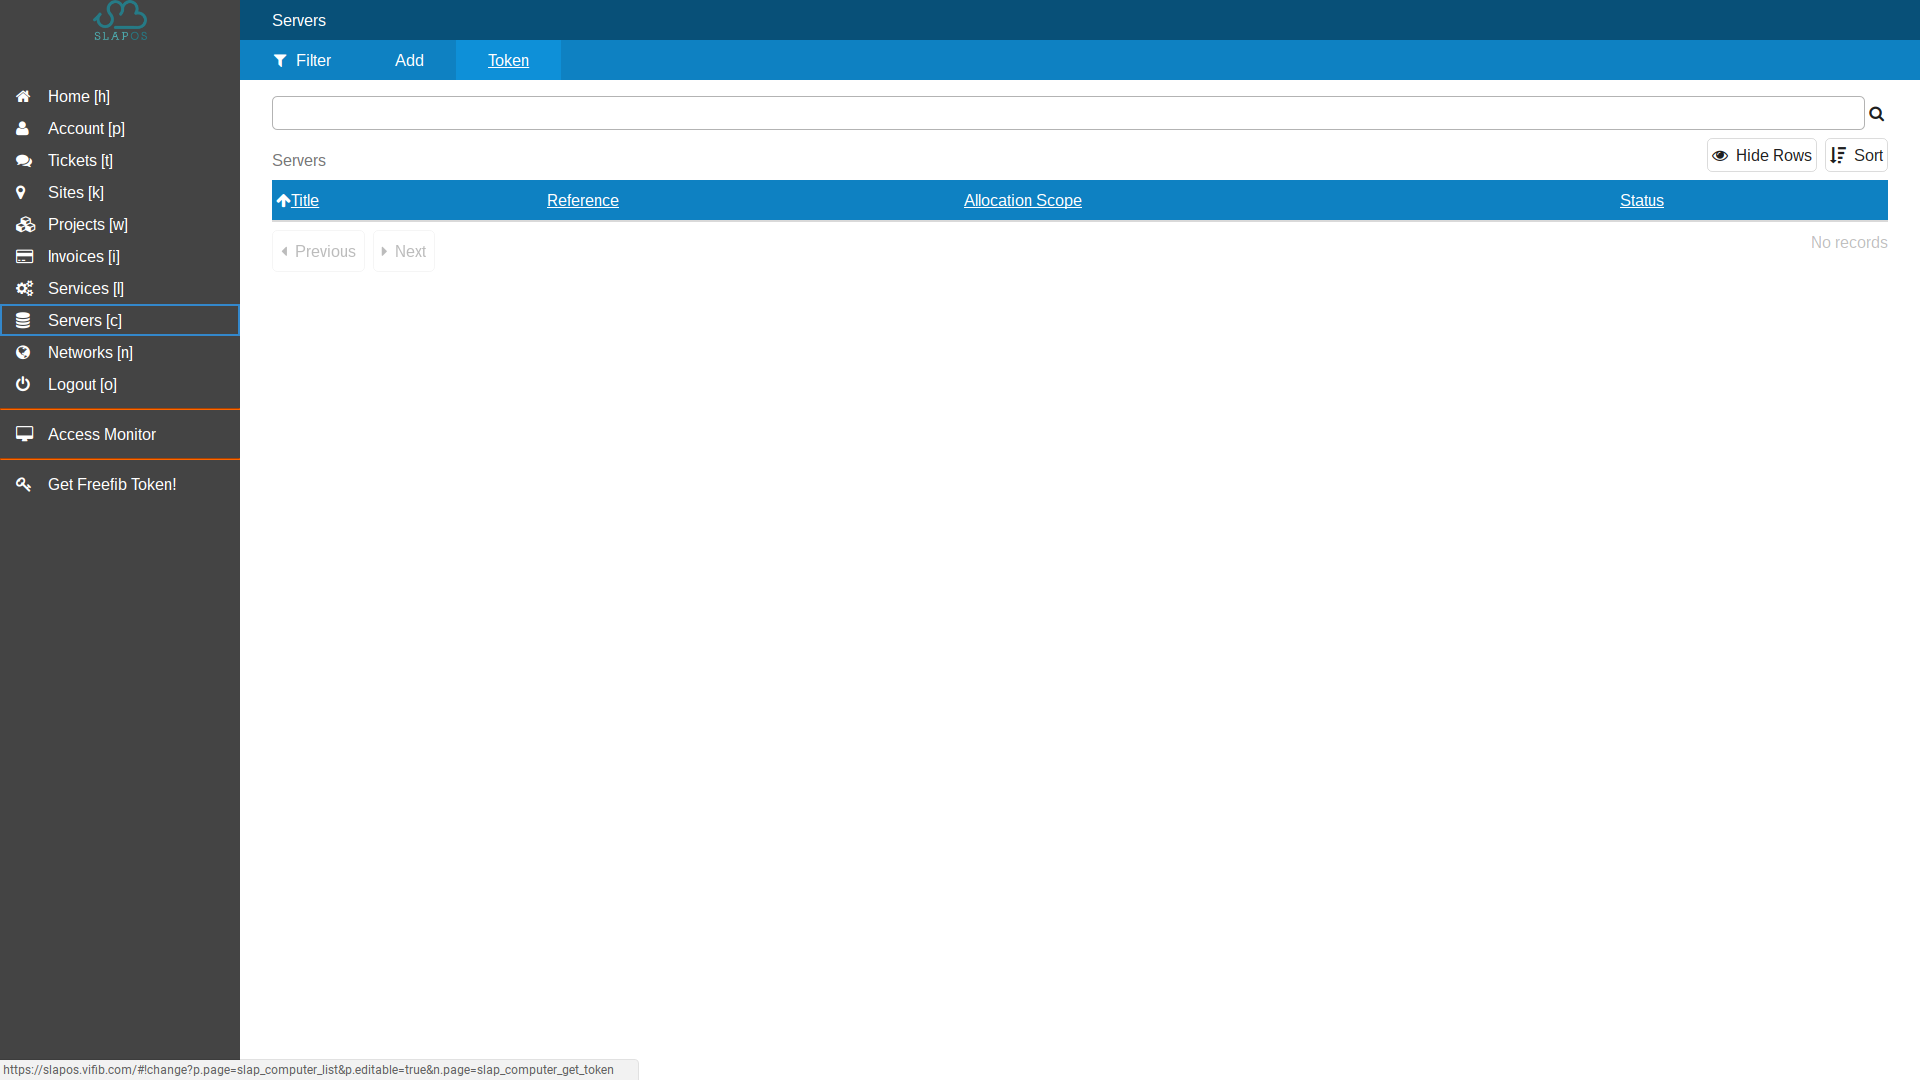
Log in to Rapid Space Panel. Click on the Servers link in the side to go to your list of servers.
When using the single line installer, you have to provide a X509 security token to identify your node with a SlapOS Master and enable it to manage the node within a network. To get such a token, in the subheader, click Token.
Association Token
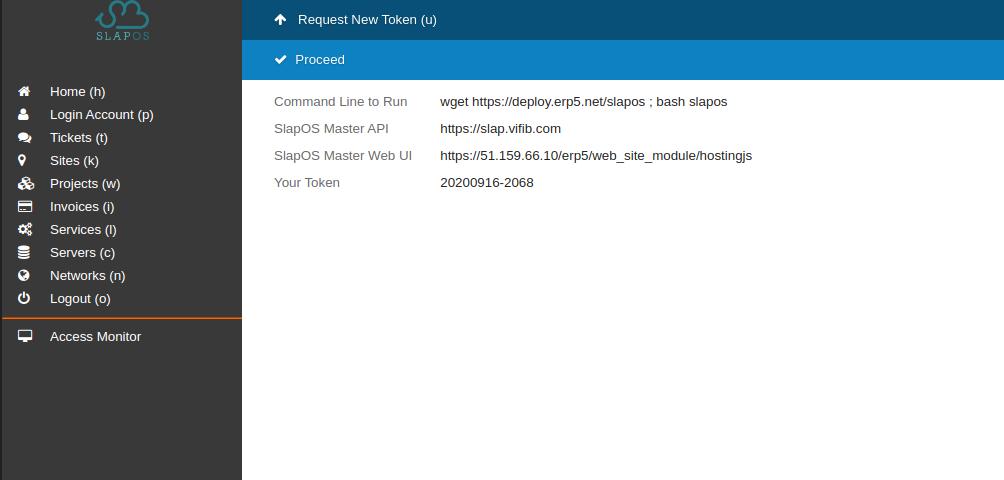
Click Token and Proceed to request a token. Once it's generated, copy the token for later. Note, that the token can only be used once. If the installation of SlapOS fails for whatever reason and you need to retry, you need to request a new token before. Head back to the terminal.
Single Line Installer
sudo su -
$ wget https://deploy.erp5.net/slapos && bash slapos

...
# What is the url to the SlapOS Master Website?  (ignore if you already have a configured re6st and slapos): [https://slapos.vifib.com/]:
# Name your computer (ignore if you already have a configured re6st and slapos or if you don't want to register your computer to SlapOS Master): [noname]: Your_computer_name
# Input your slapos token (ignore if you already have a configured slapos) [notoken]: Your_token
# Which interface will provide IPv6? (ignore if you already have a configured re6st) [lo]: lo
# How many SlapOS computer partitions would you like? [10]:
Continue and use the single line installer. You will be asked a set of questions during the installation. As you are connecting to SlapOS master, you are supposed to skip the first two questions.
Choose a name for your computer (like SOFTWARE-BOX-1) to identity it in your network and finally enter the association token you have received earlier from your Rapid.Space panel and input lo (or skip the question) for IPv6 interface because you are using Re6st.
Once the installation has finished without errors, you should see:
...
PLAY RECAP *********************************************************************
127.0.0.1                  : ok=12   changed=4   unreachable=0   failed=0
In case installation fails and you want to start over, you need to request a new token as mentioned above and, depending on whether already created, remove any existing configuration in /etc/opt/slapos/slapos.cfg before restarting.
Validation
- Verify SlapOS Node
- Verify Registered Servers on Panel
Verify SlapOS node
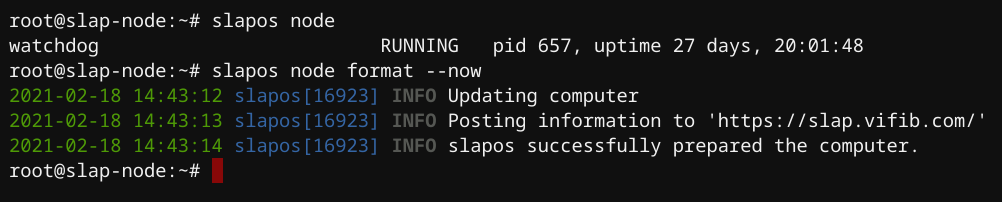
You can verify that SlapOS was installed by trying:
$ slapos node
watchdog                         RUNNING   pid 657, uptime 27 days, 20:01:48
And (re)formatting the SlapOS node:
$ slapos node format --now
2021-02-18 14:43:12 slapos[16923] INFO Updating computer
2021-02-18 14:43:13 slapos[16923] INFO Posting information to 'https://slap.vifib.com/'
2021-02-18 14:43:14 slapos[16923] INFO slapos successfully prepared the computer.
Verify Registered Servers on Panel
🔗 Rapid.Space Panel Servers List
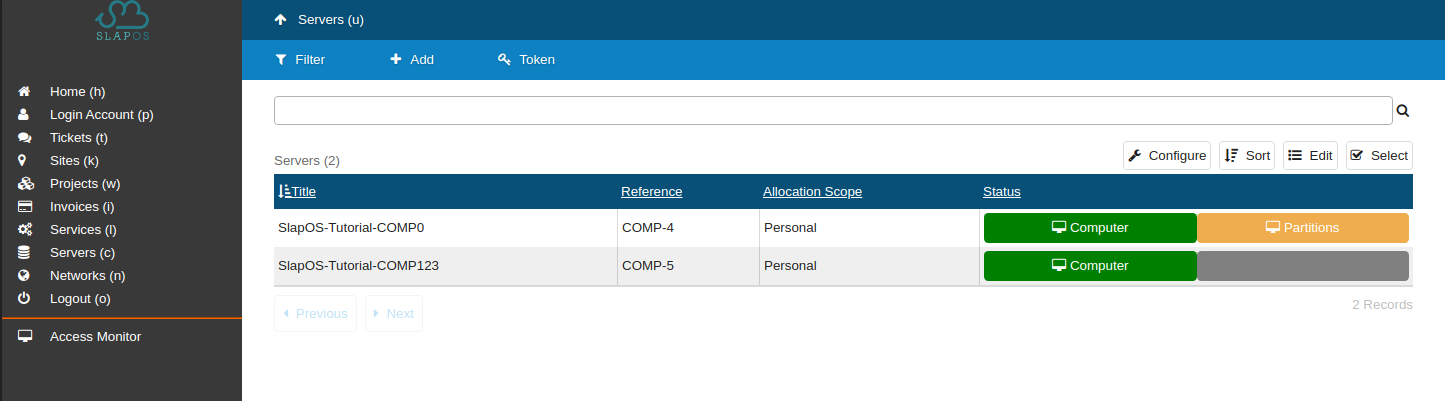
Head back to your Rapid.Space Panel and verify the list of servers now includes your SlapOS Node which was associated to your network using the token you had created. You may have to refresh the page for the server to show up.
Note, the entry has three clickable areas:
- The line itself (click server name for example) points to the server configuration
- Clicking the Computer button will open the monitor - the green color indicates the server is active and contacting the Master (yellow points at connection issues with the computer or one of its partitions, red means the computer has lost connection)
- The Partitions button will only be visible after the first instance of an installed software as been provided.